Design Your Own

Person Doll
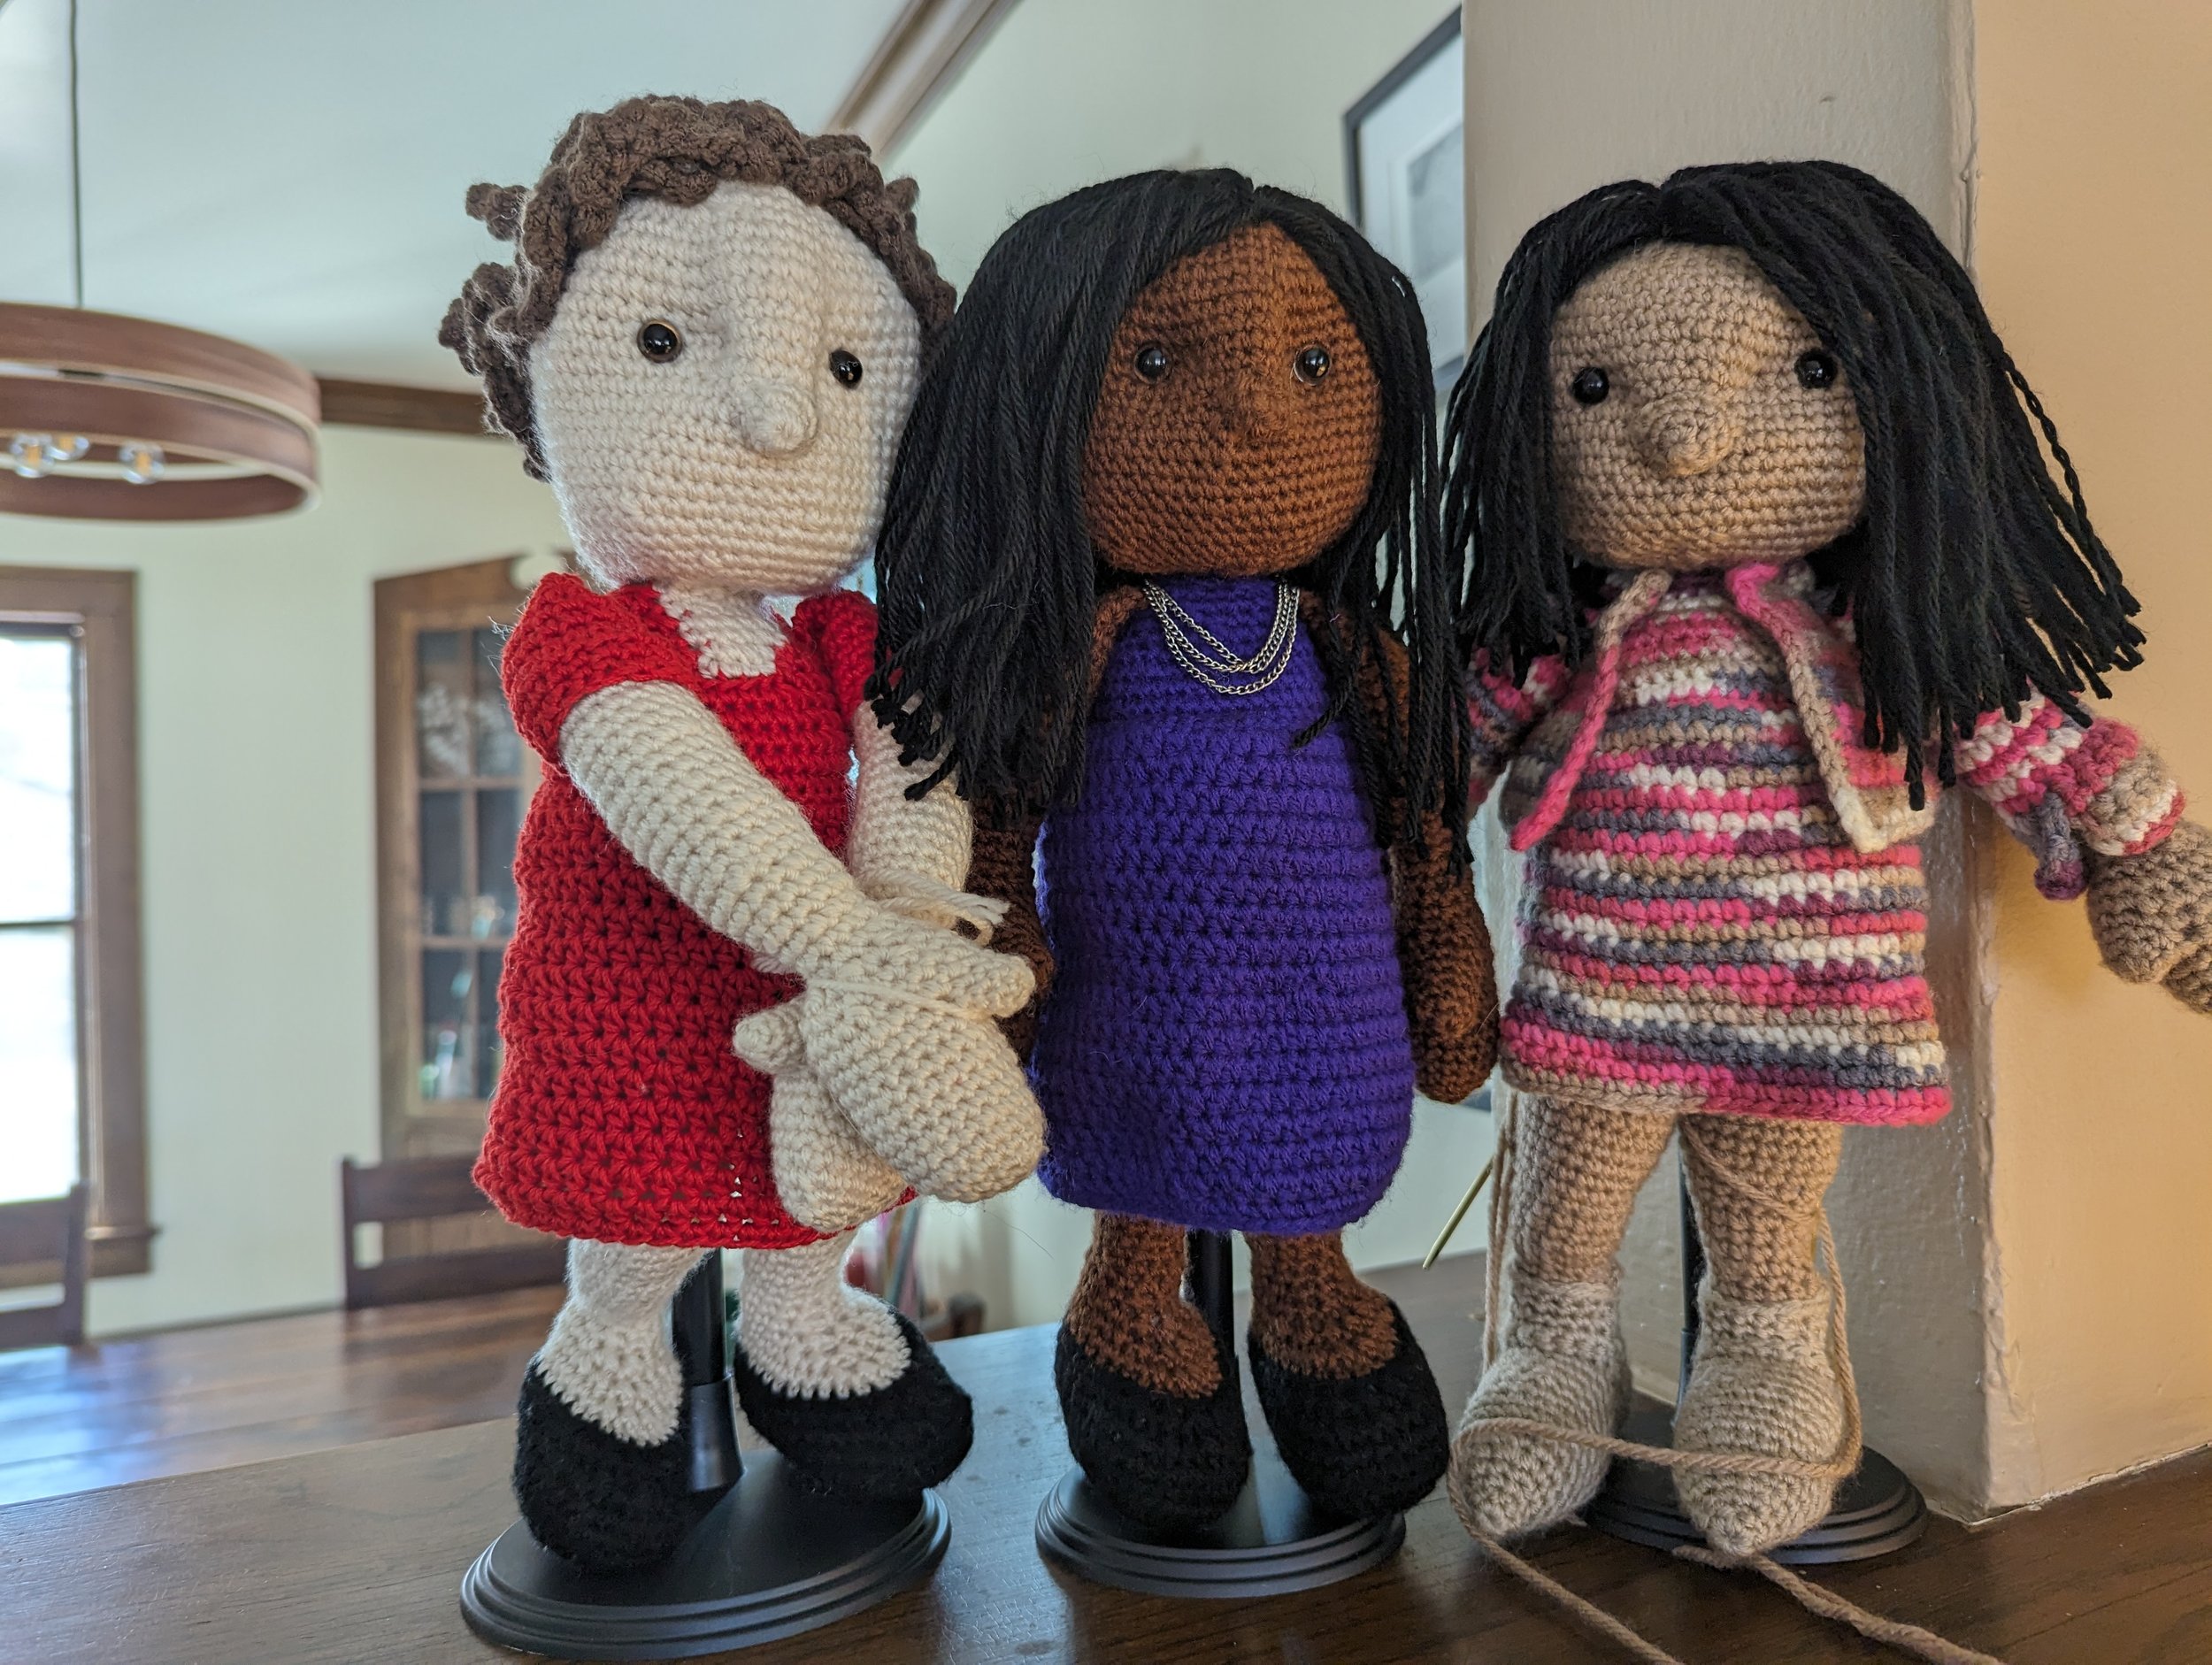
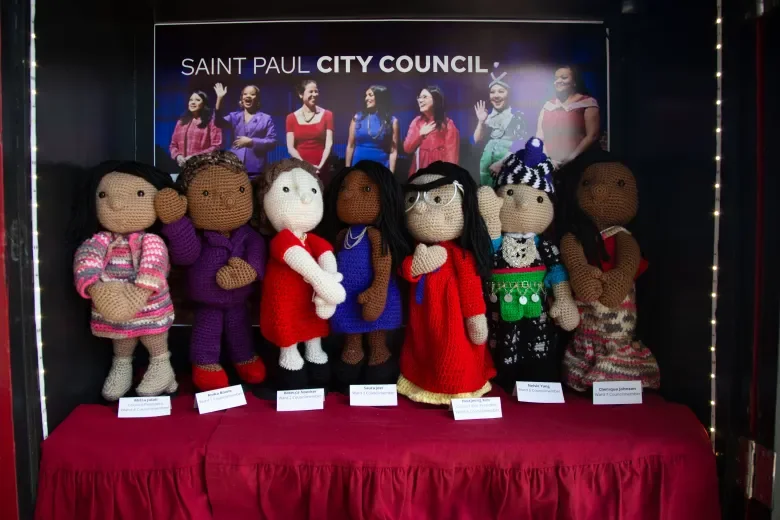
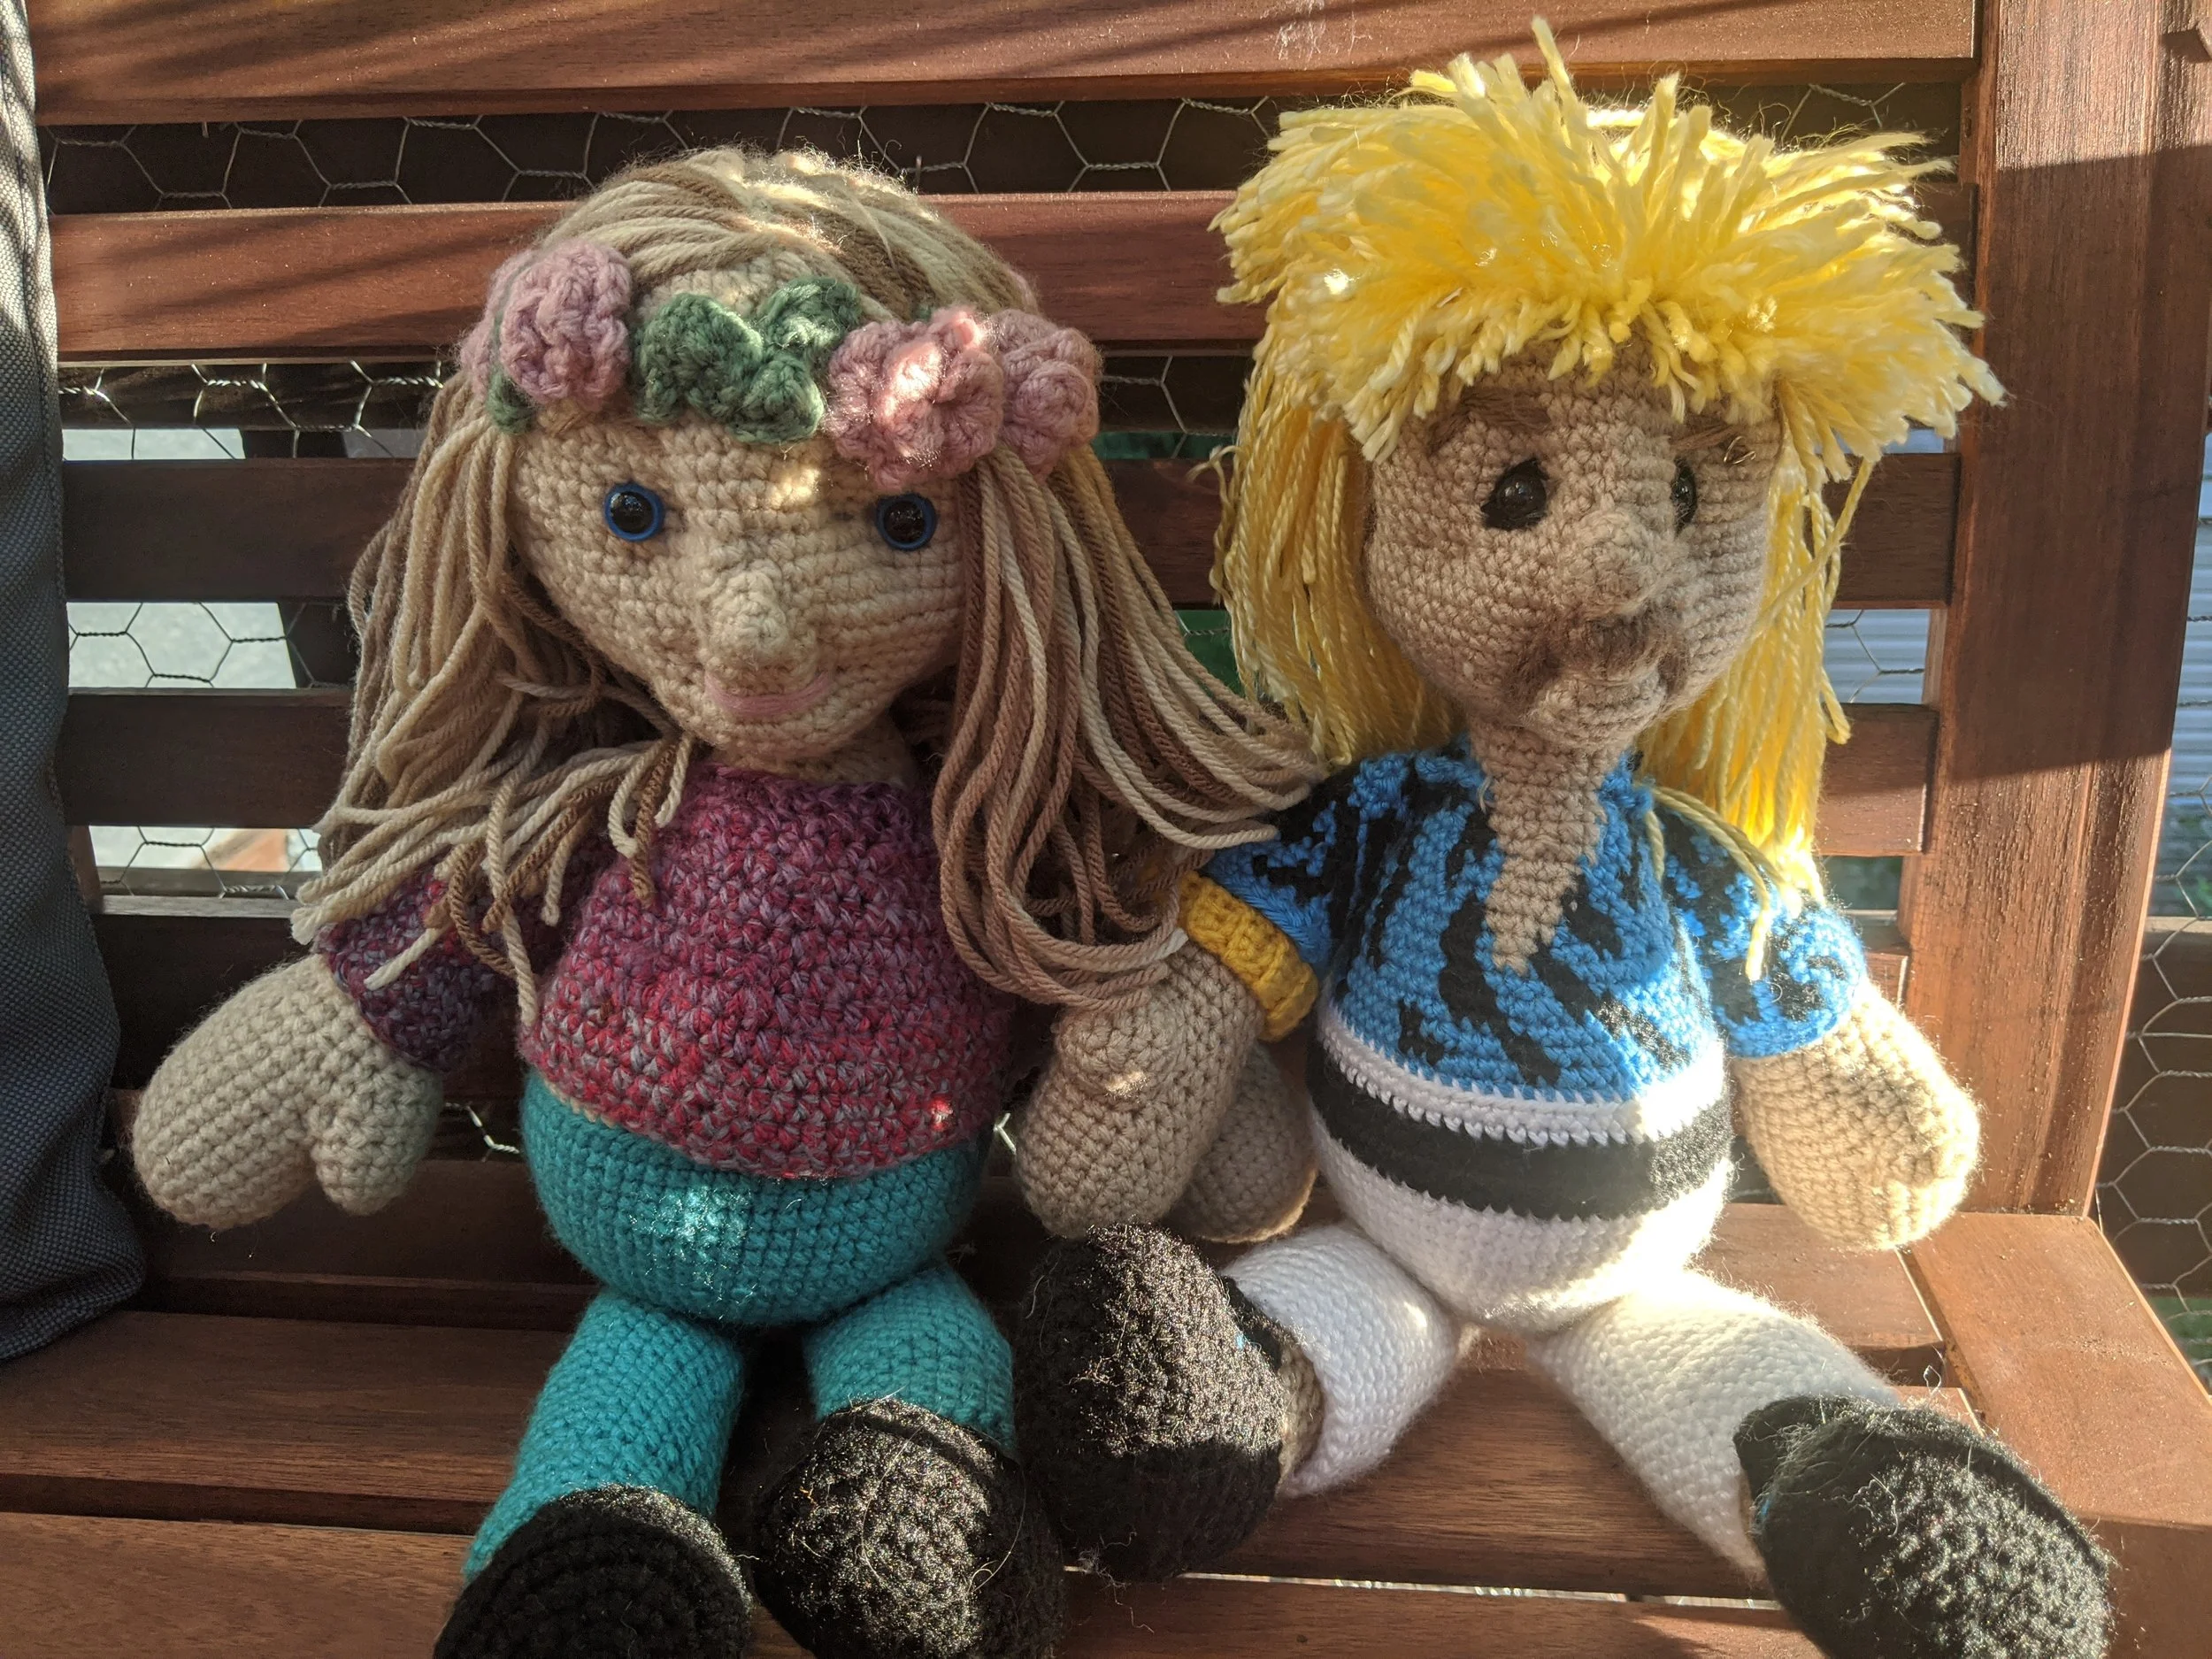
Created as a base to design your own doll, with a bit of adaptation, this pattern will help you crochet someone you admire, like your favorite child, cartoon character, pop singer, or city council member (all examples I have tried).
Height: 16" standing | Skill level: Intermediate-Advanced | Terms: US
Supplies Needed
crochet hook (I use a 3.0 mm )
stitch markers
yarn needle
scissors
fiber fill
yarn (acrylic, worsted weight)
Examples of dolls I have made:


Complete Pattern
in Following Order:
Hands and Arms
Thumb
create 6 sc into a magic circle (6)
*inc, sc* three times (9)
*sc* around (9) Repeat for 2 total rounds
Tie off. stuff tails inside and set aside to use while making hand.
Hand and Wrist
create 6 sc into a magic circle (6)
*inc* around (12)
*sc, inc* around (18)
*sc* around (18) 5 total rounds
Join thumb to hand: insert hook through thumb, inside to outside, then as usual through hand.
sctog join 4 (thumb to hand), cont. around hand, sc 14 (18)
sc, turn to work around outside of thumb, sc 5, return to hand, sc 14 (20)
*sc* around (20)
*sc 4, dec, sc 4* around (18)
hide all ends inside hand and stuff.
*sc, dec* around (12)
*sc* around (12) Repeat for 4 total rounds
Finish Hand for Long Sleeves: *sc, inc* around (18), tie off, begin sleeve instructions.
*sc 3, inc* three times (15)
*sc* around (15) Repeat for 3 total rounds
stuff wrist
*sc 2, inc, sc 2* around (18)
*sc* around (18) Repeat for 10 total rounds
Bare Arms: Skip to Finish Arm Instructions
Finish Hand / Arm for Short Sleeves: tie off, stuff arm, and set aside, skip to sleeve instructions to finish arm.
Sleeve
Created by working in rounds following a foundation chain
Foundation chain: ch 18, slst to first chain, ch 1
*sc* around (18) repeat round as indicated below:
Capped Short Sleeve: 1 round
Long Sleeve: 2 rounds
Short Sleeve: 3 rounds
Longer Short Sleeve: 4 - 6 rounds
All: Join Sleeve to Arm: Sew in tail at start of sleeve, carefully pull the arm through so the top of arm and sleeve line up and working yarn is accessible.
*sctog join (sleeve to arm)* around (18)
Short sleeves: Skip to Finish Arm Instructions
*sc* around (18) Repeat for 13 rounds total
Continue to finish arm instructions.
Finish Arm
*sc* around (18) Repeat for 2 total rounds
*sc 7, dec* two times (16)
*sc 3, dec, sc 3* around (14) ensure arm and hand are lightly stuffed.
*dec, sc 5, * two times (12) crochet to corner
ch 1, sctog closed 6 (6) tie off, set aside until creation of body
Skirt (optional)
Completed in rounds, following a foundation chain. You will start at the top of the skirt which will be joined to the body at the waist, working toward the bottom of the skirt. Add additional rounds before tying off for a longer skirt.
Foundation row: ch 48, do not twist the chain, slst to start of chain
*sc* around (48) Repeat for 5 total rounds
*sc 7, inc* around (54)
*sc* around (54) Repeat for5 total rounds
*sc 4, inc, sc 4* around (60)
*sc* around (60) Repeat for 5 total rounds
tie off. set aside to use while creating body
Shoe and Leg (make 2)
Will your doll be standing or sitting, wearing pants, shorts, or a dress? What type of shoes will they have, and will those shoes be flat or heels? For flat shoes or bare feet, skip to Foot / Shoe Instructions.
Heel (optional)
Complete heel instruction based on type. The short, wide heel is used for shoe types like loafers, men’s dress shoes, or hiking boots. After heel is complete, continue to foot, returning to alternate joining instructions when prompted. At the end of the heel, tie off, but do not remove sm until attaching it to the shoe.
High Heel
6 sc into a magic circle
*inc* around (12)
*BLO sc* around (12)
- 6. *sc* around (12) Repeat for 3 total rounds
*sc, inc* around (18)
sc 12, do not complete round (12)
Extra High, Narrow High Heel
6 sc into a magic circle
*sc, inc* around (9)
*BLO sc* around (9)
- 6. *sc* around (9) Repeat for 5 total rounds
* inc* around (18)
sc 12, do not complete round (12)
Short, Wide Heel
6 sc into a magic circle
*inc* around (12)
*sc, inc* 6 times (18)
*sc* around (18) for wide high heels complete round 4 additional times.
sc 12, do not complete the round.
Shoe Alt. Instructions: Joining Heel to Shoe
sc 9, *inc, sc* three times, sc 9, sctog 6 (heel to shoe) 6 (33)
continue around sole of shoe
sc 10, *inc, sc 2* two times, inc, sc 10, inc 6 (42)
stuff heel. In next round, attach the outside of the heel by crocheting through outside of heel to inside and then through the sole of the shoe, starting with the sm on the heel (remove this sm)
BLO sc 30, sctog join 12 (outer heel to shoe)
If the sole of the shoe is a different color from the body, switch colors. Return to round 7 of shoe instructions.
Foot / Shoe and Ankle
Created in rounds following the initial foundation row, start with foot color for bare feet, or the shoe sole color for all others. Main instructions create bare foot and leg, with alternate instructions in sub-points below each round for creating one of two shoe types:
Ballet: Shoes where skin on top of foot is visible, such as ballet flats, or many high heels
Lace Up: Shoes where skin on top of foot is not visible such as dress shoe or sneaker
Boots: Follow lace up instructions, do, continuing with leg instructions in boot color until desired length, complete next round BLO in skin color, after leg complete add one round of boot color in front loops of boot.
If adding socks, switch to the sock color instead of skin color when prompted. Continue until socks are desired length, then switch to skin color and complete the first round of skin color BLO.
Shoe / Foot
Foundation Row: ch 10, starting in the 2nd ch from the hook: sc 9 across, ch 1, turn (9)
*BLO sc 7, BLO inc, BLO sc 3 all in the last stitch*, turn, cont. on the other side in remaining front loops. Repeat instructions a second time (24)
*sc 9, inc 3* two times (30)
Heeled Shoes: switch to alternate attach heel inst. now
sc 9, *inc, sc* three times, repeat all round instructions again (36)
sc 9, *inc, sc 2* three times, repeat all instructions in round (42)
*BLO sc* around (42)
Bare Feet- Skip Round 6, if sole of shoe is different color from body of shoe, switch colors
*BLO sc* around (42)
*sc* around (42)
sc 9, *dec, sc 2* three times, sc 21 (39)
sc 9, *dec, sc* three times, sc 21 (36)
sc 6, dec 6, sc 18 (30)
Ballet Shoes: in skin color, *BLO sc* around (36)
*sc* around (30)
Ballet Shoes: sc 6, dec 6, sc 18 (30)
Lace Up Shoes: sc 6, dec 3, BLO sc 18 (27)
sc 3, dec 6, sc 15 (24)
Lace Up Shoes: BLO sc 4, BLO dec 3, switch to skin color, leave shoe color at front of work (24)
sc 3, dec 3, sc 15 (21)
*sc 5, dec* around (18)
*sc* around (18)
stuff foot
*sc 2, dec, sc 2* (15)
*sc* around (15) Repeat for three total rounds
sc 11, inc, sc 3 (16)
Finish Foot for Pants: sc, *inc 2, sc* to end (24), tie off, complete lace up shoe instructions if needed, then skip to pants Instructions
*sc* around (16)
*sc 7, inc* around (18)
*sc* around (18)
*sc 4, inc, sc 4* around (20)
*sc* around (20)
*sc 2, inc, sc 2* around (24)
stuff ankle
*sc* around (24) Repeat for ten rounds total
Finish for Shorts: tie off, stuff leg, complete lace up shoe instructions if needed, then skip to pants / shorts Instructions
Bare Legs / Skirts: switch to dress color and complete finishing leg instructions
Pants / Shorts
Created by working in rounds following a foundation chain. Foundation chain: ch 24, slst to first chain, ch 1,
*sc* around (24) Repeat for 5 total rounds
Join Pant to Ankle: Sew in beginning pant tail and pull over the ankle it lines up and working yarn is accessible. For longer pants or shorts, create more rounds before joining.
sctog join 24 (pant to ankle) (24)
*sc* around (24)
Pants: repeat for 12 total rounds
Shorts: Repeat for 3 total rounds
Return to complete finishing leg instructions.
Lace Up Shoes: Finishing Steps (optional)
Using the shoe color tail left at the front of the work, pull up a loop in the front of the shoe, working in the front loops at top of shoe, creating the tongue of the shoe first in the very front and center.
sc 3, ch 1, turn
inc 3, ch 1, sc once on the side of the tongue, then slip stitch back into the first stitch, at the corner of the tongue, ch 1
sc in all loops around, ending in the same stitch as the other side of the tongue sc 21, ch 1, turn (21)
*sc* around (21)
For high top shoes repeat round 4 two or three more times. tie off. hide all ends inside of the shoe, use yarn and a sewing needle to add laces on the front of the shoe.
Finish Leg
Finish for Standing Doll
*sc 3, inc* around (30)
*sc* around (30) tie off, complete lace up shoe instructions if needed, stuff leg.
On second leg: Do not complete final round or tie off. continue to standing body instructions
Finish for Sitting Doll
*sc, dec, sc* around (18)
*sc* around (18) switch to dress / body color, stuff leg
*sc, dec* around (12) crochet to corner
*sctog closed* across (6) tie off, set aside and make sitting body instructions.
Body
Begin Sitting Body
Begin working with pants or dress color in rounds.
make 6 sc in a magic circle (6)
*inc* around (12)
*sc, inc* around (18)
*sc, inc, sc* around (24)
*sc 3, inc* around (30)
*sc 2, inc, sc 2* around (36)
*sc 5, inc* around (42)
Attach legs: sc 13, *sc 2, sctog join 6 (leg to body)* two times, sc 13, (42)
*sc 3, inc, sc 3* around (48)
*sc 7, inc* around (54)
*sc* around (54) repeat for two rounds total
Do not tie off, skip to Complete Body instructions
Begin Standing Body
Continue to sc around the leg until you reach the place where the legs should join together in the front of the doll. Count will vary based on several factors such as tension, yarn type, and clothing type, but average count for bare legs was about 14 sc. Line both feet up so they are angled as desired and join legs by inserting hook first through unattached leg / first leg created, inside of work to out, then through the current leg as normal to pull up the first loop of join stitch.
*sc* as needed, sctog join 10 (legs), place sm in last st, cont. around same leg (~24 - 30)
*sc, inc* three times, sc 15, cont. on other leg, sc 15, *inc, sc* three times, final in sm, remove sm (48)
sc 2, *inc, sc* three times, sc 32, *sc, inc* three times, sc 2 (54)
Do not tie off, skip to Complete Body instructions
Complete Body (all types)
Begin working with pants or dress color, in rounds. To sew limbs on later sc join round. Create the desired neckline using color changes beginning typically in rounds 20 - 23. Standard neckline is to switch to skin color after round 22. Other neckline options include:
Lower v-neck: in round 20.) make the 2 st at center of chest BLO skin color, in 21.) make 4 (BLO, 2 sc, BLO), in 22. create 4 skin color sc between arms, 23) all skin color.
Turtleneck: 23) BLO in skin color, with shirt color tail left in front, after complete, pull up loop of clothing color in loops left at neckline, *sc* around (18)
*sc* around (54) repeat for three rounds total
*sc 2, dec* three times, sc 30, *dec, sc 2* three times (48)
*sc* around (48) repeat for 8 rounds total
Pants / Shorts: If using, begin Belt Instructions now, all others complete 4 rounds pants color, switch to shirt color for remaining rounds, with first round BLO
Dress/ Skirt: Complete 2 rounds, pull skirt over the body. Third round: *sctog join (skirt to body)* around. If different color shirt: switch color and BLO in 5th round.
*sc 2, dec* three times, sc 24, *dec, sc 2* three times (42)
*sc* around (42)
*sc 5, dec* around (36)
*sc* around (36) repeat for two rounds total
*sc 2, dec, sc 2* around (30)
*sc* around (30)
stuff
*sc 3, dec* around (24)
*sc* around (24)
Join Arms to Body: ensure thumbs are facing correctly with about 6 sc between
*sc 3, sctog join 6 (arm to body), sc 3* around (24)
*sc, dec, sc* around (18)
*sc* around (18) tie off, set aside.
Head and Face
The head and face are made last, then attached to the body. To complete a head with short cropped hair (using color changes) use the Close Cropped Hair Alternate Head instructions
Nose
create 6 sc into a magic circle (6)
*inc, sc* around (9)
*sc* around (9)
sc 3, tie off and set aside to use during head creation.
Alternate instructions for different shaped noses.
Head
begin by working in rounds with the hair color, for bald dolls, start with skin color.
create 6 sc into a magic circle (6)
*inc* around (12)
*sc, inc* around (18)
*sc, inc, sc* around (24)
*sc 3, inc* around (30)
*sc 2, inc, sc 2* around (36)
*sc 5, inc* around (42)
switch to skin color
*sc 3, inc, sc 3* around (48)
*sc 7, inc* around (54)
*sc* around (54)
*sc 4, inc, sc 4* around (60)
*sc* around (60) Repeat for 12 total rounds
Crochet in Nose: in 9th of total rounds, scjoin 4 (nose to face) in middle of round, starting with last st of nose.
*sc 4, dec, sc 4* around (54)
*sc 7, dec* around (48)
*sc 3, dec, sc 3* around (42)
*sc* around (42) Repeat for 2 total rounds
Place Hair: install the hair in the top circle and and in a strip down toward the base of the head. Then fill out as desired. More hair tips and types.
sc, *dec, sc* around, (18)
sc 5, dec* around (36)
*sc 2 ,dec, sc 2* around (30)
*sc* around (30)
*sc 3, dec* around (24)
if needed, install any additional hair
Face Shaping and Eyes: stuff head firmly complete face shaping and place safety eyes. Stuff and sew on nose and add eye white and eyelash accents if using. Confirm face stuffing and sew tail toward back of head to remain attached but out of way before continuing. Additional Face shaping tips
dec, sc 12, dec 5 (18)
dec, sc 6, dec 5 (12)
*sc* around (12) Repeat for 3 total rounds
*sc 2, inc, sc 2* around (18)
*sc* around (18) Repeat for 3 total rounds
*sc, dec* around (12)
stuff neck firmly
*dec* around (6)
tie off, sew closed. set aside until the final assembly.

Final Assembly
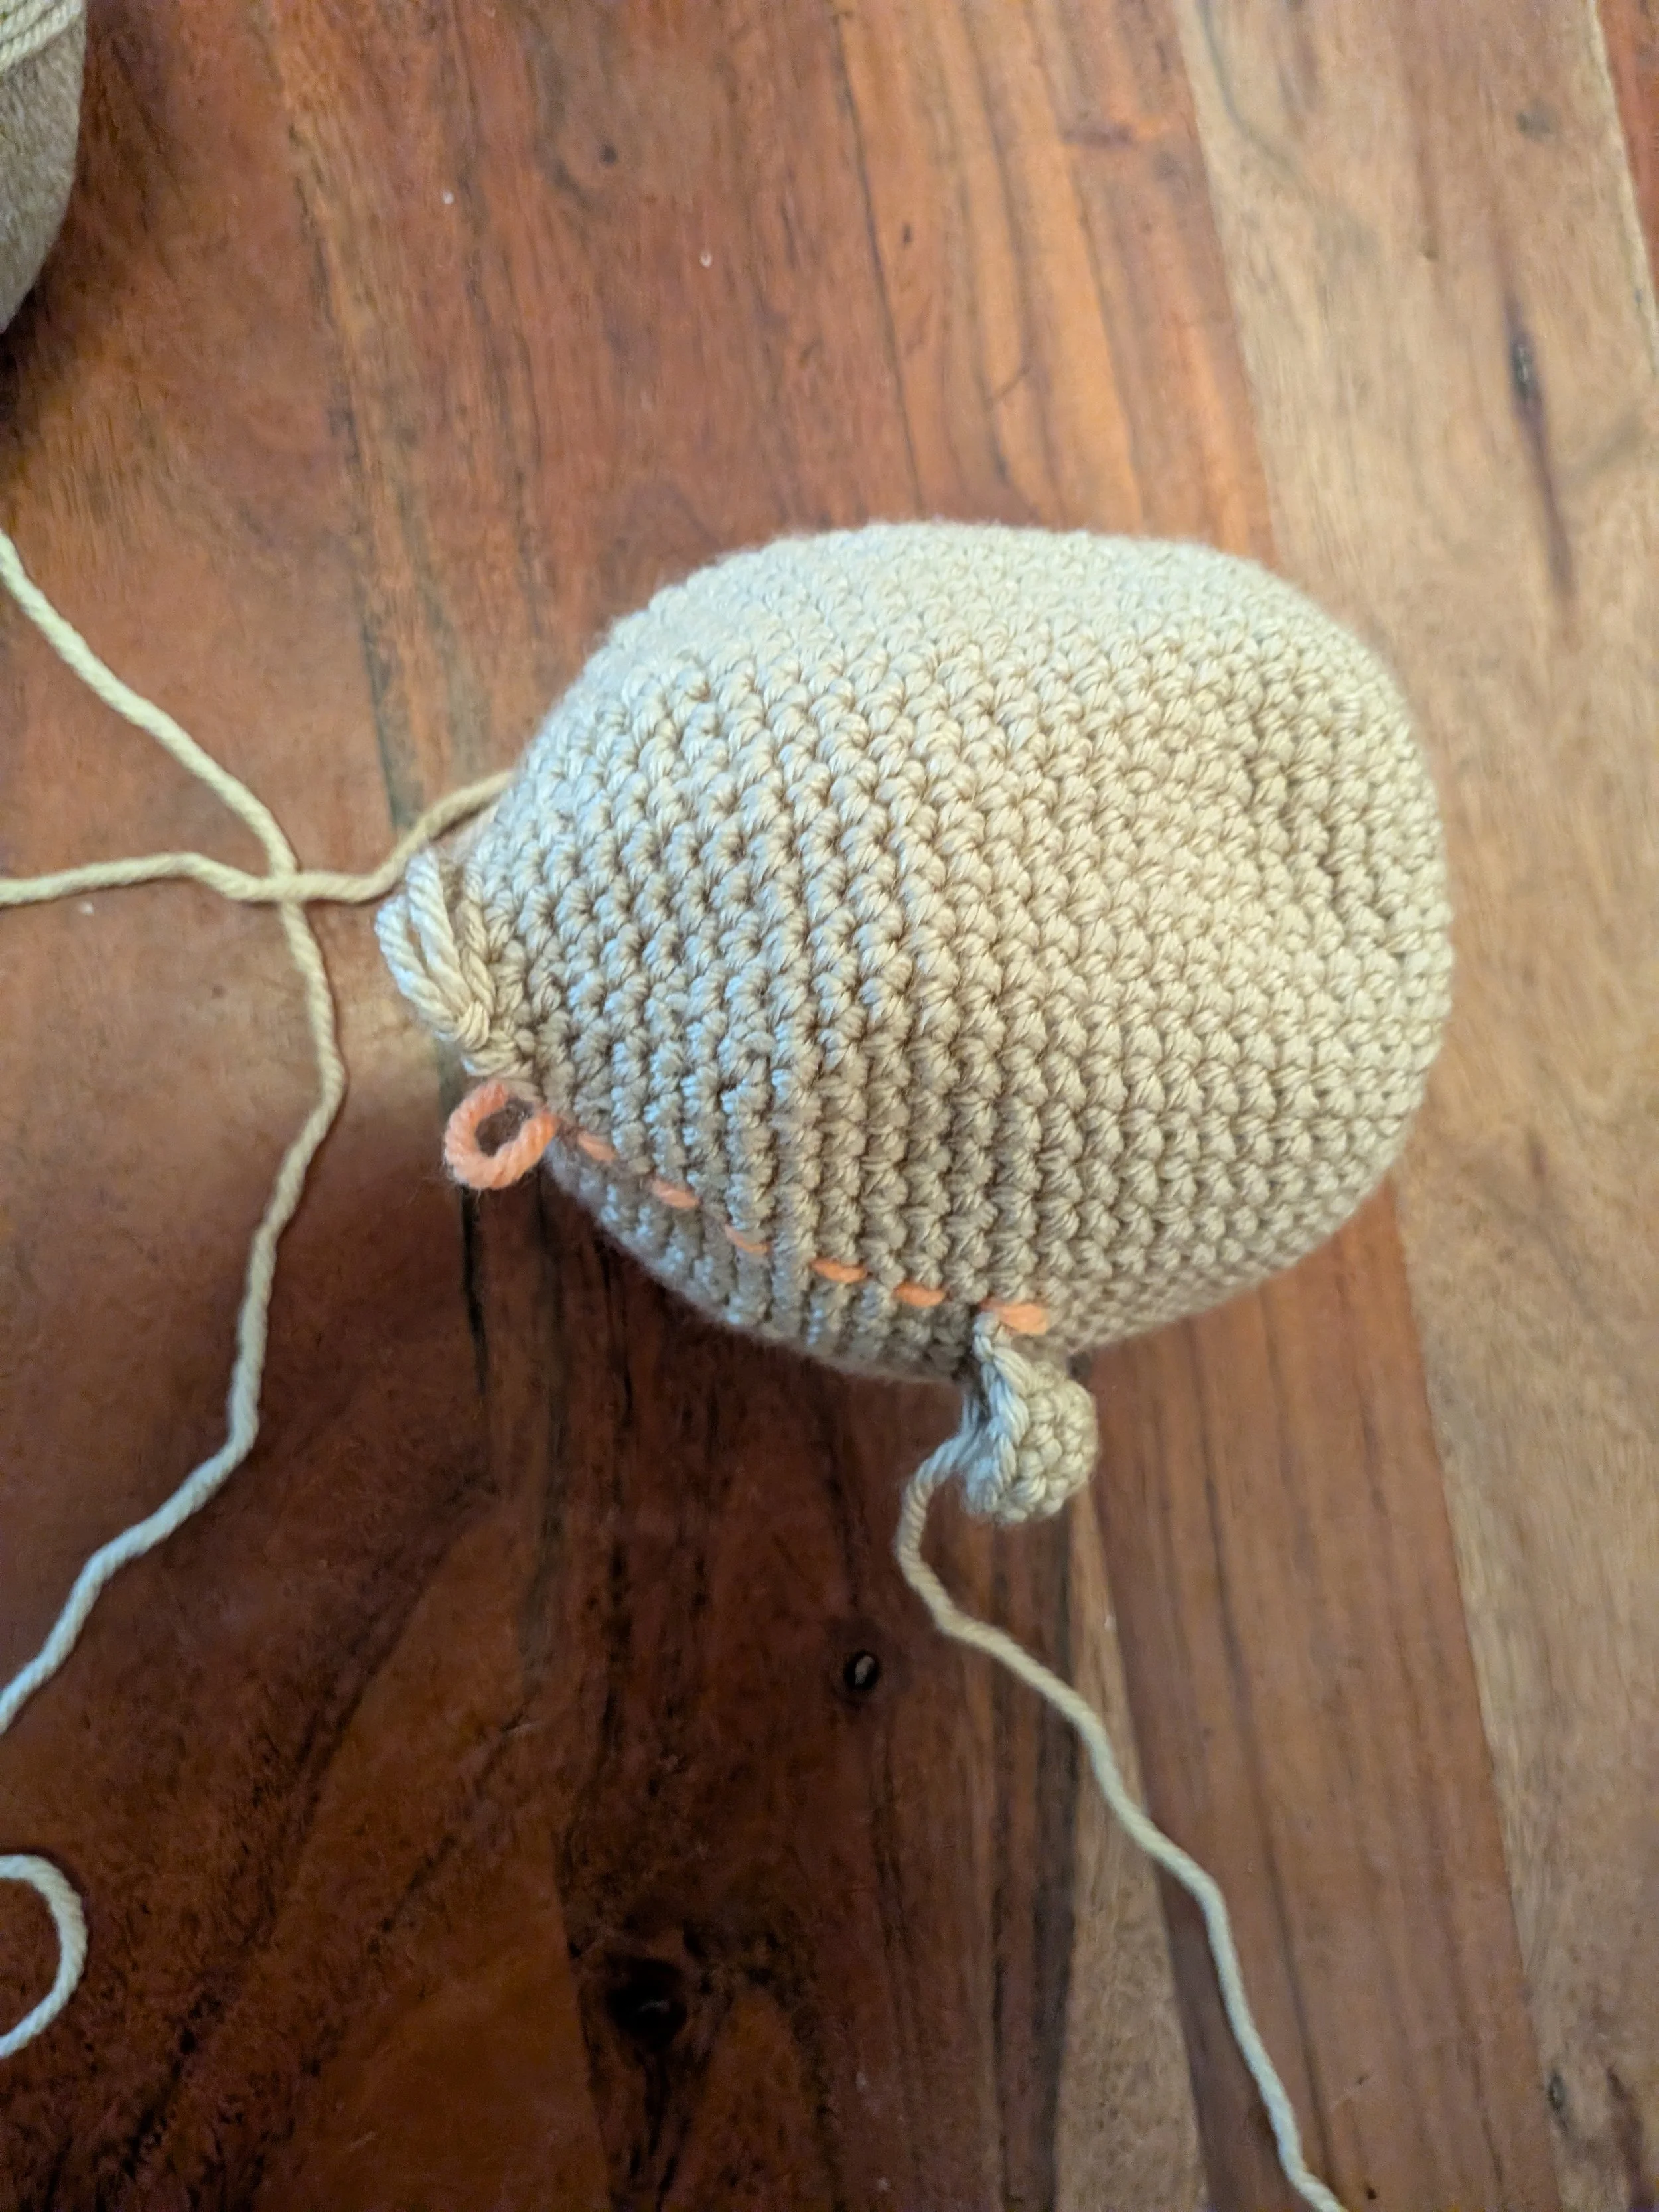
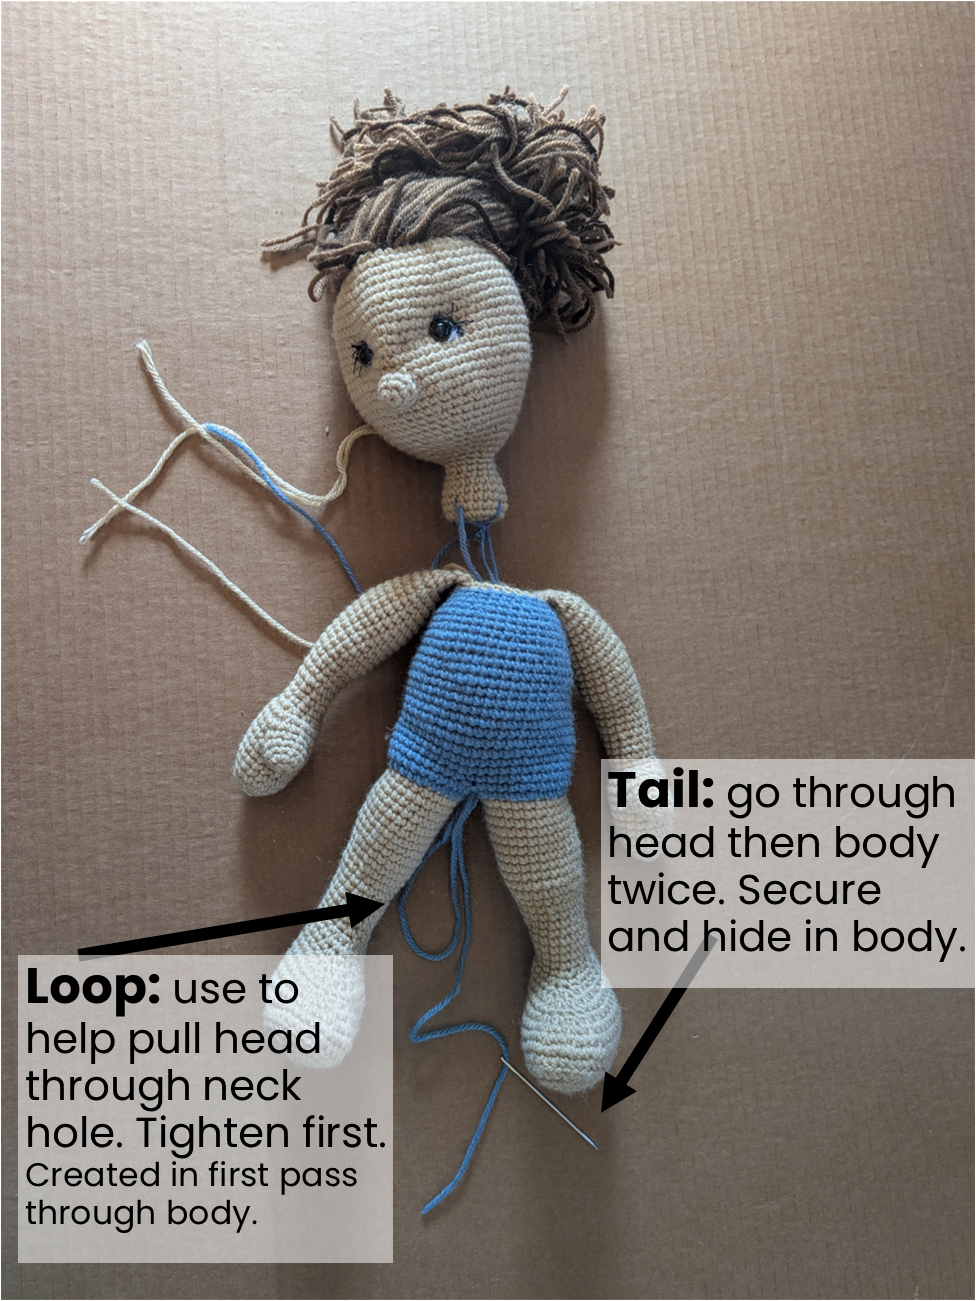
Sew on any body or face parts, sew head to body. To Check face shaping if needed, then secure head before attaching. Thread a needle with a long string of the pants color. Sew through bottom of neck and firmly attach with a large secure knot. Break up a hole in the body stuffing so it is just possible to fully insert the neck inside of the body, keeping as much stuffing in the body as possible. With the head and neck outside of body, Insert needle through neck hole, all the way through the body and exit between legs. Leave a large loop and sew back up through the neck hole, through neck and back down through body again. Stretch neck and pull on loop of string to pull neck on head fully through the neck hole on the body. Fully tighten first the loop and then the end to fully secure and anchor the head in body. Hide tail see reference photos.
Ensure the body is firmly stuffed around the neck, and sew the stitches of the body neck hole to the doll head, stretching and stuffing the neck as needed as you sew to minimize floppy floppiness of head / neck.
Sew any additional parts or attached accessories. Hide and cut tails and cut hair to desired style. You may want to leave face shaping tail attached and complete a haircut after first wash to make any needed corrections based on how doll looks following washing.
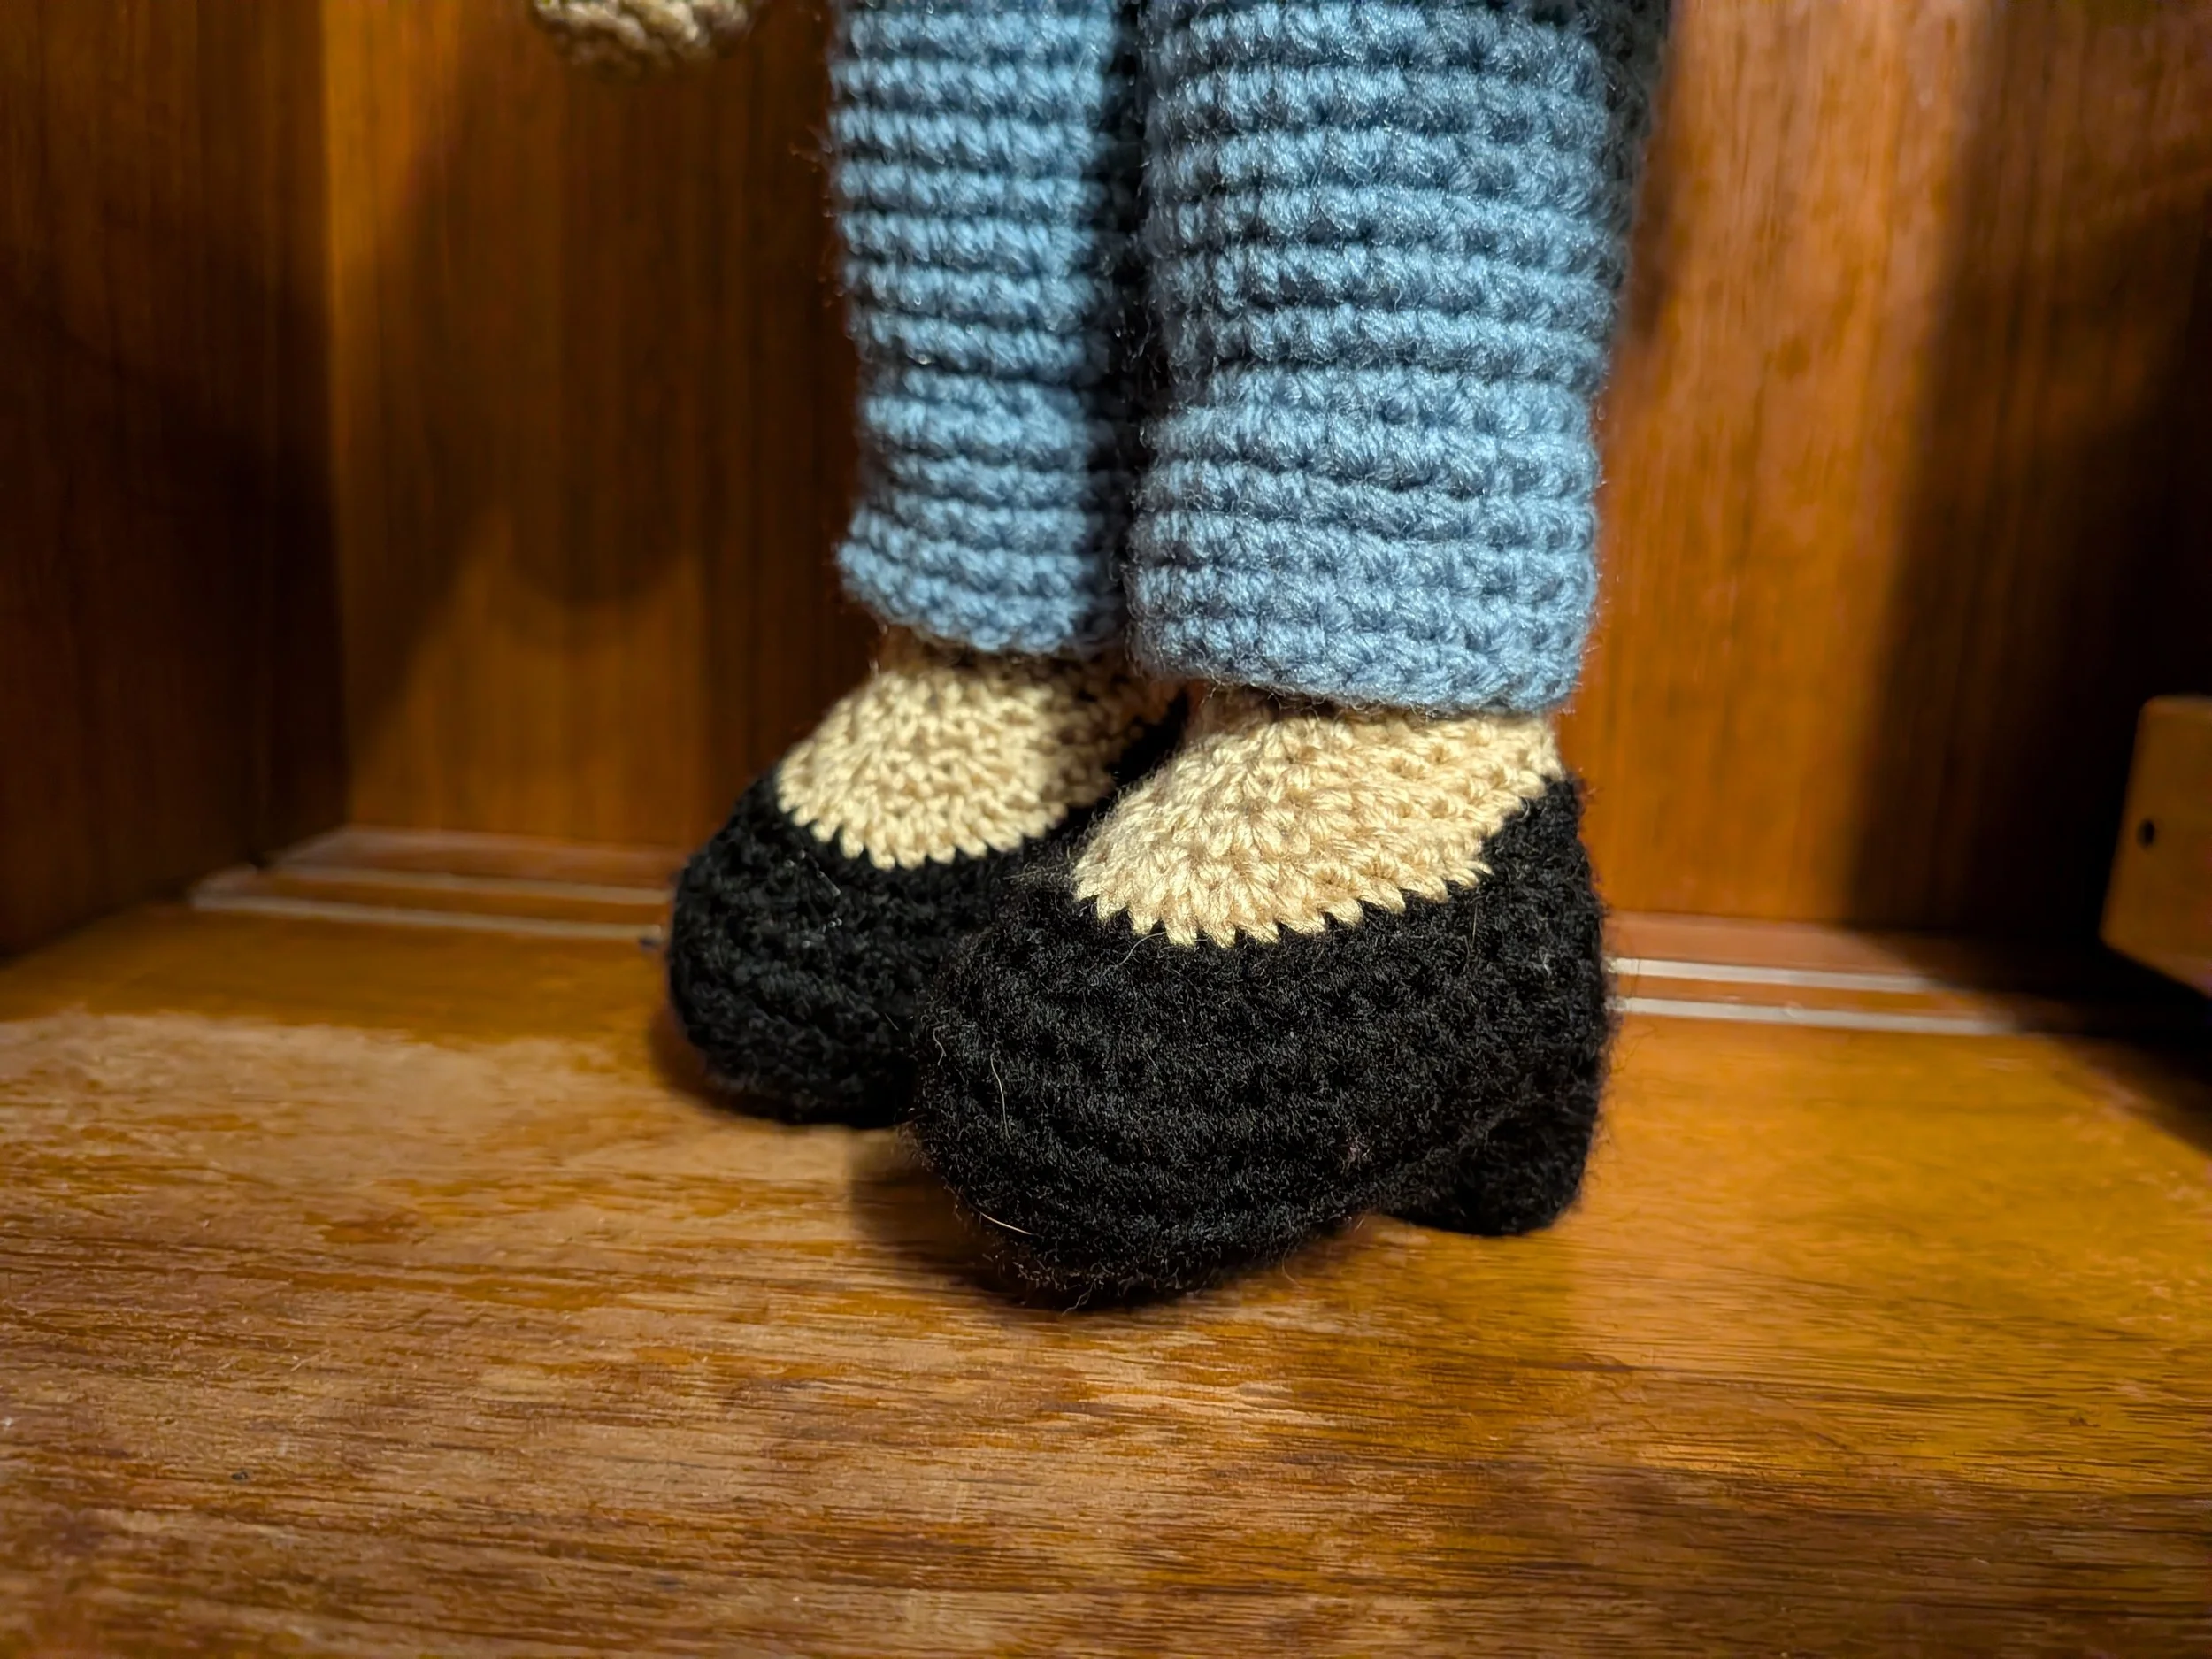
Reference Photos


Alternate Instructions
Belt and Belt Loops
Both are crocheted in rows, complete before creating body.
Belt
ch 3, begin in second loop from the hook, sc 2, ch 1, turn (2)
- 61 sc 2, ch 1, turn (2) 60 total rows
switch to buckle color, crochet along top of belt
sc 3, ch 4, pull chain across belt slst to other side of belt, ch 1, sc 3 back toward end, ch 4, slst to first buckle tie off and sew in ends.
Belt Loops (make 5)
ch 5, begin in second loop from the hook, sc 4, tie off, (4)
Instructions for attaching to body
When prompted, sc in the belt loops by sticking the hook through the end of the belt loop piece, and then attach the top of belt loop in subsequent round. Starting with the first round of *sc* 48 around.
Instruction: *sc* around (48) 8 rounds total
Attach bottom of belt loops: *sctog join 1 (loop to body), sc 8* two times, sctog join 1 (loop to body), sc 10, *sctog 1 (loop to body), sc 8* two times (48)
*sc* around (48) two total rounds
Attach top of belt loops: *sctog join 1 (loop to body), sc 8* two times, sctog join 1 (loop to body), sc 10, *sctog 1 (loop to body), sc 8* two times (48)Smin front sc 5, *sctog(loop to body), sc 8* four times, sctog(loop to body), sc 5 (48)
switch to shirt color, complete first round of shirt color BLO, and complete remaining rounds
Pull belt through belt loops and secure belt buckle. Return to complete instructions for completing the body.
Face / Head Options
Additional Nose Options
Extra Small Nose
create 6 sc into a magic circle (6)
*inc, sc* around (9)
sc 3
tie off and set aside to use during head creation.
Wider Nose
create 6 sc into a magic circle (6)
*inc, sc* around (9)
sc 3, *inc* two times, sc 2, *inc* two times (13)
*sc* around (13)
sc 3
tie off and set aside to use during head creation
Cartoon eyes
Create two, using white yarn.
Foundation Row: ch 4, starting in the 2nd ch from the hook: sc 3 across, ch 1, turn (3)
*BLO inc, BLO sc, BLO sc 3 all in the last stitch*, continue around the other side of the foundation row, working into the front loops left behind in the previous step. Repeat instructions between * * a second time FLO (12)
*slst* around, slst to start of row (13)
tie off, add small safety eyes through the seam in back. Sew on to face after face shaping.
Short Cropped Hair, Alternate Head Instructions
Complete nose, then create head using color changes to create a close cropped hair style. Begin by working in rounds using the hair color. H: hair color S:skin
create 6 sc into a magic circle (6)
*inc* around (12)
*sc, inc* around (18)
*sc, inc, sc* around (24)
*sc 3, inc* around (30)
*sc 2, inc, sc 2* around (36)
*sc 5, inc* around (42)
begin to include skin color
*sc 3, inc, sc 3* around (48) 4 times with H, 2 times S (48)
*sc 7, inc* around (54) H: 4 times, S: 2 times
*sc* around (54): S: 2, H: 32, s: 20
*sc 4, inc, sc 4* around (60): S: 4, H: *inc, 8* three times, S: *inc, 8* three times, sc 4
*sc* around (60) 12 total rounds
S: 5, H: 27 S: 28 (60) 5 rounds
S: 10, H: 18, S:32
S: 12, H: 14, S: 34
S: 14, H:10, S: 36
Nose round : S: 14, H: 10, S: 23, sctog nose to face: 4, S: 9
S: 14, H: 10, S:36 2 rounds
S: 60
Return to main instructions for head in round 24